Sunday, March 25, 2012

The Unvarnished Truth

It's been some time since my last post but no worries, my silence was caused by neither sickness nor laziness.

Okay, I'll admit, with the unseasonably warm weather, I did in fact get a chance to go for this year's first bike ride, the first sail on C-Lute and my first paddle in my old 12' Pungo Kayak.

And then my sister from Germany came for a lovely visit. The weather couldn't have been nicer and Iris and I got to take some wonderful day-trips together with her.

But you didn't really think that I'd lose sight of my Night Heron, did you?!

Right! I have, indeed, continued working on my former winter-project which now has officially turned into my spring fling, albeit at a different pace because at this stage, the boat building effort requires a different rhythm: No longer can you just "go at it".

Center board supine
The new regimen involves great care, a fine foam roller, good brushes, and a smooth stroke. The counterpoint to these is increasingly finer grit wet sandpaper, elbow grease and a generous sprinkling of patience. Varnishing is hard work but then you have to wait for the varnish to cure before you can apply the next coat.

While waiting for varnish to cure I did a couple of other jobs that I had kept waiting for just such occasion... such as repairing a banged up center board of my  Johnson-18 sailboat

Fitting the front bulk head require a little trick
and cutting out and fitting the minicell bulk heads.

To tell you the truth, I lost track of exactly how many coats of Goldspar Varnish I applied.

Basically, rolling on the varnish must be done rather swiftly - without any breaks - to ensure that you don't loose the wet edge of the already varnished section for the next section to blend in perfectly.

The amber hue of the varnish is starting to glow
With each successive coat I got a better feel for how it should go and after the last two coats I felt that I had reached sufficient proficiency to do a perfect varnishing job on someone else's boat, or start my own next project --- quickly before I "lose my touch".

A well-lit space would help greatly. My garage lighting is less than perfect and even after a number of coats, after inspecting my effort from all angles afterwards, I'd still find an area or two where my roller or brush missed a spot - dang!

And then - you have to wait until the varnish has cured before you can wet sand to get the surface ready for the next coat - 400, 600, 800, 1,500 - you get the idea. Two weeks ago, the weather was still cold and I found that I had to wait two days for the varnish to cure before I could sand. With the climbing temperatures it became possible to sand after 24 hours.

Yesterday I rolled on what I believe to be the last coat. Ta-Taaaa!

I then headed to an automotive shop and bought 2,000 and 3,000 grit wet sand paper as well as 3M Finesse from West Marine to burnish the final coat. The latter were all suggestions by Joey who knows a thing or two about getting her done just so.

I'll need some hours to get that job done before doing the final coat of bottom paint.


After that I'll be reporting mostly on finishing tasks such as installation of seat, back rest, hip braces, bulk heads, pad-eyes and bungees, safety line.

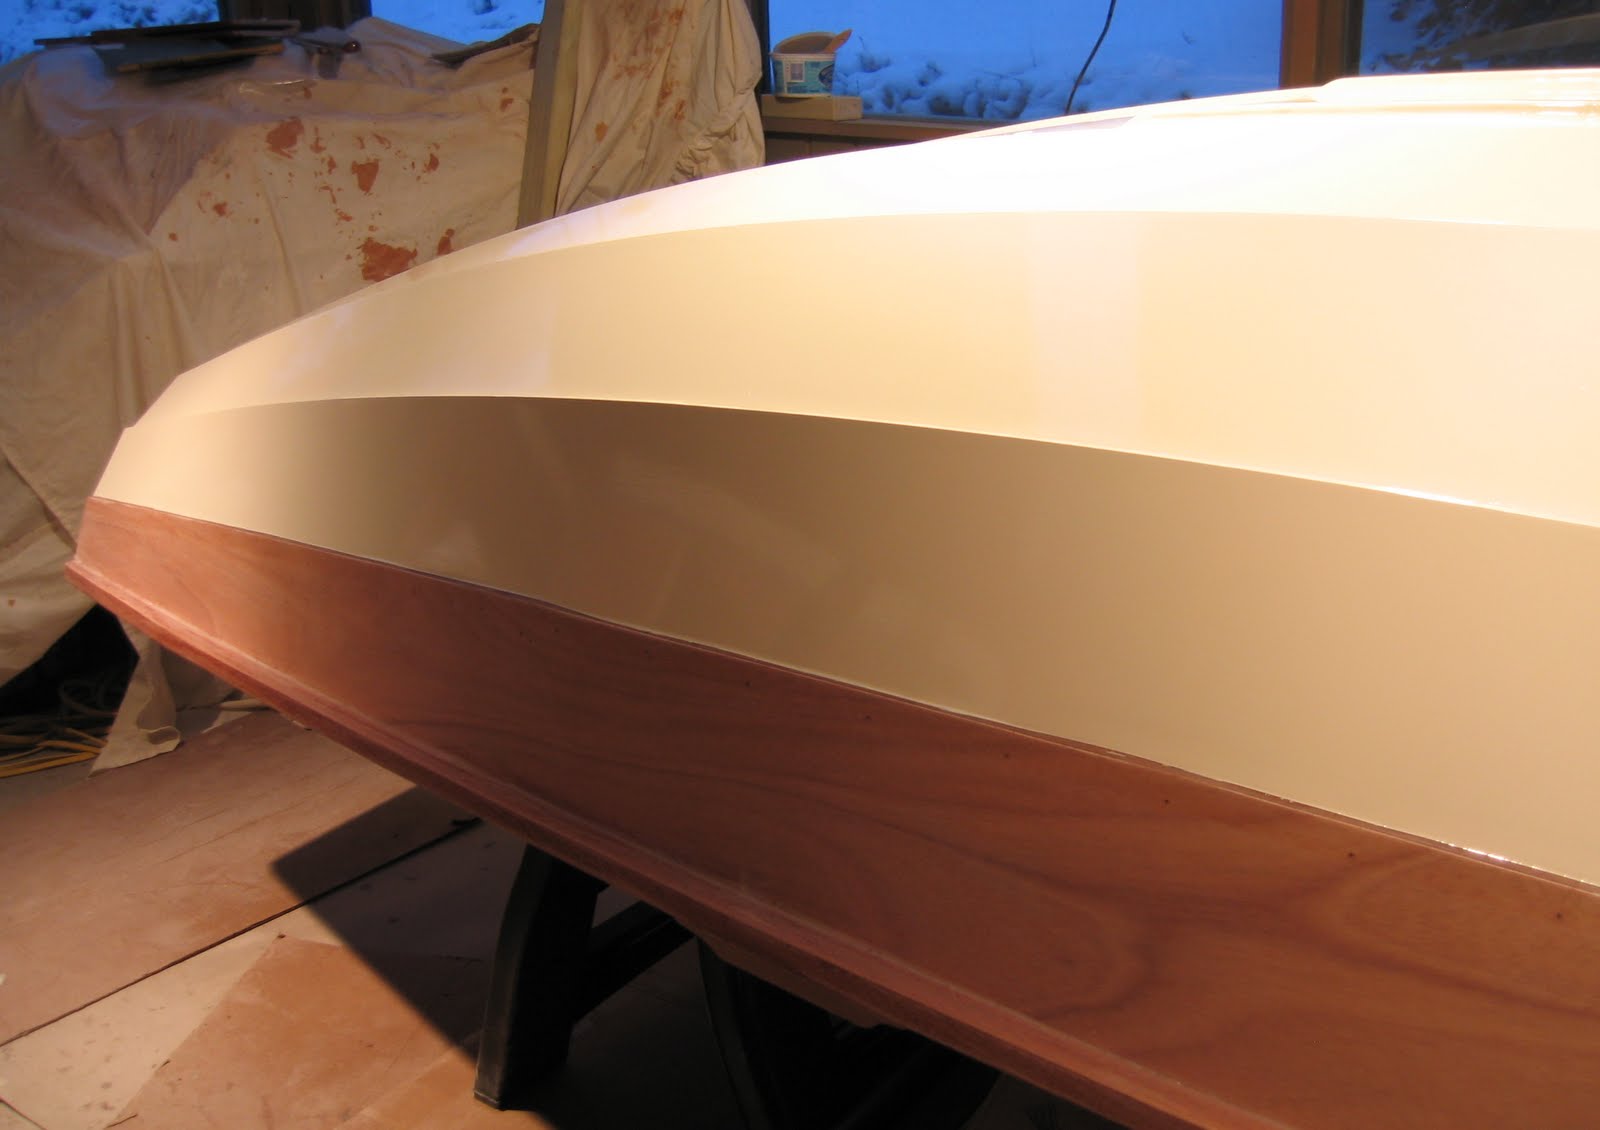
Day Light for the Night Heron


I'll also divulge the trick I had to employ in order to fit the front bulk head. It has not yet been sealed in.

Saturday, March 3, 2012

I Sea Green

Yes, I've been seeing sea green on my C-Kayak.

First coat - Primer still showing
Gosh, this has been an unexpectedly strange week in a green sort of way.

The name of the color I had picked for the bottom paint is Sea Green. It is a fairly dark and pretty color which to my eyes nicely complements the okoume of the hybrid hull.

My last paint job was on the Passagemaker Dinghy. I used Hatteras (off-)white which rolled onto the strakes like milk and honey.

By the third coat it looked totally velvety-shiny and immaculate. Not so my experience this time... let's call it INexperience.


Second coat
After the initial coat of primer I did not expect the first coat of green to look like much. However, I was a bit concerned because the paint just did not roll well. By the second coat my concern increased and after the third coat, a call to Dr Joey at CLC was in order. The paint simply did not behave the way it is supposed to - no bubbles to tip and strangely streaky. Joey suggested thinning the paint with Penetrol and  Mineral Spirits.

Fourth coat - not too bad at a distance...
Well, that trick certainly improved matters greatly. Even so, I was still quite dissatisfied with subsequent coats. I tried to put on the perfect final coat three times and each time little specks emerged seconds after everything had looked perfect. What was going on?

Another call to CLC! Dr. Joey diagnosed the problem... (the solution: wet-sand with 400 grid between each coat and no wiping down with denatured alcohol!) except now I had run out of green paint.

I'll have to order another can. I am putting on hold any considerations for fancy designs until I have learned to work with dark paints and feel reasonably confident that I am able to control the outcome.

In the meantime, the sea-green does indeed look quite fetching next to the okoume.

I may use some tape to do a mock up of my design idea and then decide whether I want to pursue it. Happily, I like the paint lay-out as is, so I won't do anything else unless the boat-building spirits compelled me. It was a relief to finally see the deck after a week of "seaing" green... enough to get you a bit bent out of shape.

Coming up, I will work on the varnish job and later roll on a final coat of green - assuming I'll finally get it right.