But not so fast!
Before we reached this point, a number of finishing touches took place.
 |
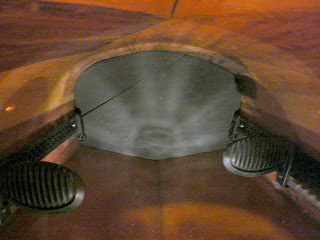
| Would not fit in one piece |
The foot brackets were in the way and the thick mini cell bulk head simply had not sufficient flexibility to be squeezed in.
My solution was to put it in place in two sections.
Yep, had to cut her up.
 |
| Prior to sealing it into permanent position |
It worked out alright.
I now was able to put in the larger section from the cockpit forward and the smaller section fit through the front hatch and could be finagled into position with all sorts of little tricks such as using a ruler in between the foam to allow it to slide in place.
By far the most unpleasant task in this final stage is sealing the bulk heads into position with 3M 5200 Permanent Sealant Adhesive. Joey warned me that it was "hateful stuff". And I found out why he had come to that conclusion.
Working with the semi permanent 3M 4200 Sealant is a breeze by comparison. I heeded Joey's council and had a rag and plenty of mineral spirits on-hand to clean up messes. I also had lots of extra rubber gloves handy. Not surprisingly, the seal around the forward bulkhead from the cockpit was the trickiest because it had to be managed without the support of a second hand. Only one arm would reach in far enough.
Then came the gasket on the inside lip of the hatches and the inside bungees to pull the hatches tight on the gaskets thereby providing a water-proof seal. The job was straight forward and simple. I suspect that it'll take a couple of days until the gaskets are sufficiently compressed to provide a totally flush appearance of lids and deck.
Then came some decision time.
How to set up the front and back bungees!
The more typical setup for the front bungees is to criss-cross in an X pattern in front of and behind the cockpit. I definitely did not like this look for the front section. It interfered too much with the underlying design.
For now I resolved the matter with parallel bungees running side to side. It is actually a very practical setup and has the advantage that anytime you use one bungee to clamp down an object the adjacent bungee protects the varnish from unnecessary scratches.
In the back I used the more traditional look.
I added one additional bungee strap half way back.
This will enable me to conveniently strap my Greenland paddle along the back.
I am not sure about that one yet. It certainly is practical but obviously it does not enhance the design. It would be easy to remove.
Another finishing touch concerned the grab handles. Many builders carve beautiful wooden grab handles and I started to fashion one from a nice piece of mahogany.
However, upon further thought I abandoned the project and opted to go for the simple soft, knotted grab handle the way the folks at CLC generally do. Also, I figured that a soft grab handle would be less likely to bang against the bow.
Installation of the back brace in the cockpit was confusing to me until I actually sat down to do the job. I worked with the kayak upside down and head in cockpit to see what I was doing... it was easy.
Two days before I had carved and coated with epoxy the short wooden blocks into which the back brace webbing is screwed.
For the actual seat I had purchased one from CLC rather than making one from mini cell. Installation was easy and the first test fitting was entirely to my liking.
I still have to make the hip braces and knee braces... also from mini cell foam... but for all intents and purposes, the kayak is ready to go! AND - I am ready to go!
Anyway, these last two items won't be finalized until I've been in the water with the Night Heron and gotten a better feel for what may feel most comfortable.
My Night Heron is ready to flap its wings and take off...
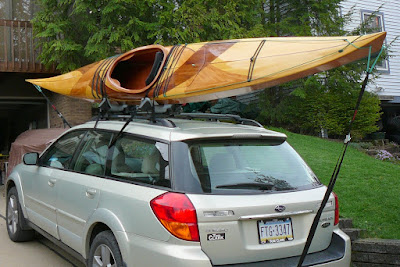
...just so the launching point is not the roof of my car. I've been testing the roof rack and figuring out how to maneuver this 18 foot dagger safely on and off the roof of my car - single-handed.
Ha - there you go!
It's a balancing act!!!
...and isn't that true for so much of what we do?


The aqua fabric looks lovely—funny how certain shades just stick with us. I recently came across aqua braces on myaquadental and couldn’t help but notice the colour match!
ReplyDelete